Bird watchers everywhere will know how difficult to identify wading birds can be. They can look similar to each other and cause a debate to which species it is. In today's How To Draw, I may not help you out with seperating them completely, but learning to draw waders will lead you down the right path. Waders are also seperated by bill and body size and shape, plumage colour and pattern, and leg length and colour. It is best to keep notes on how they feed as well. I am drawing three species for you today, all three representing a particular body shape. Hopefully, you will be able to add the features of the species you want to draw that I haven't drawn yet to the body shapes drawn here by yourself.
 |
| Stage One |
Representing the short and dumpy-shaped waders is the snipe. This is a small bird with a long bill and cryptic plumage, so it also demonstrates how to draw these features for other waders you come across. The basic shapes to start your snipe drawing is an oval for the body and a circle for the head. I also add a simple line for the bill and the legs.
 |
| Stage Two |
It is now time to develop the details in the plumage. Starting at the head, I draw the heavy marks on the snipe's crown (top of its head) and work my way round the head and breast with lines and spots. In the process, you are measuring out where the eye goes and the width of the bill's base. From the base of the bill, shade in a mark down the length of the bill and simply draw around that mark, narrow at the tip and wider towards the base. The cryptic plumage pattern is created by first drawing round shapes for light areas and then adding dark marks around them. Don't worry to much for accuracy at this stage, just try and include as much detail as you can. While you are drawing the pattern, you are building and improving the body shape as you go along, including adding the tail, wing tips and legs.
 |
| Stage Three |
As you redraw over the snipe in pen, this is where you can attempt at accuracy in detail. Start at the head and the bill first. Then move round from the breast and towards the tail through a series of dot and blob marks. When you reach the wing's pattern, draw round the pale areas that you marked earlier and add more dark markings beside it. It is probably best to draw the detail as you go along, starting from the tip of the wing and work your way back towards the head.
 |
| Stage Four |
Colour in your snipe. I covered a light layer of yellow all over the bird first before applying more of it across the darker areas. I also used orange to highlight the even darker areas of the plumage. Leave the belly white and colour the legs yellow.
 |
| Stage One |
For my second drawing, I am doing a curlew to represent waders with long legs, a neck and a more elegant body. This is also a bird that fits the curvy bill catagory, which will work for drawing waders with upright curved bills too. The basic structure for a curlew is a circle, a large oval for the body, connect the two with two lines for the neck and simple lines for the bill and legs.
 |
| Stage Two |
Just like with the snipe, focus your attention on plumage with lines and dark marks, building the body shape as you go along. The bill is really long and curves downwards. From the top of the bill's base, draw a line to the tip of the bill and draw it back to the bottom of the bill's base, extremely narrow at the tip but wider near the base. Draw in the long legs with feet that have up to three toes at the front (though sometimes you can just see two from certan angles) and one at the back.
 |
| Stage Three |
Redraw your curlew in pen using the same technique as I did with the snipe. For waders that are rather plain in plumage, you don't need to worry about such details. You just need to draw the outlines and shade in your wader instead.
 |
| Stage Four |
Colour in your curlew. The plumage is brown with a light covering of orange. The bill is pink or red.
 |
| Stage One |
My final drawing is a lapwing to represent plover-shaped birds. Plovers are round-headed birds with short bills and angular body shapes. For my lapwing, I draw a small circle for the head (can be larger for other plover species) and I create a series of round or oval shapes to build the shape of the body and I made a round triangular shape for the wing tip. The bill and legs are lines.
 |
| Stage Two |
Starting with the bill, I make a heavy shaded mark that extends up the top of the head leading to a spike for the lapwings crest, while leading down from the bill, I shade in a collar round the neck. The eye is also added in. Draw a line for the wing and divide it up with a series of scribbled shapes.
 |
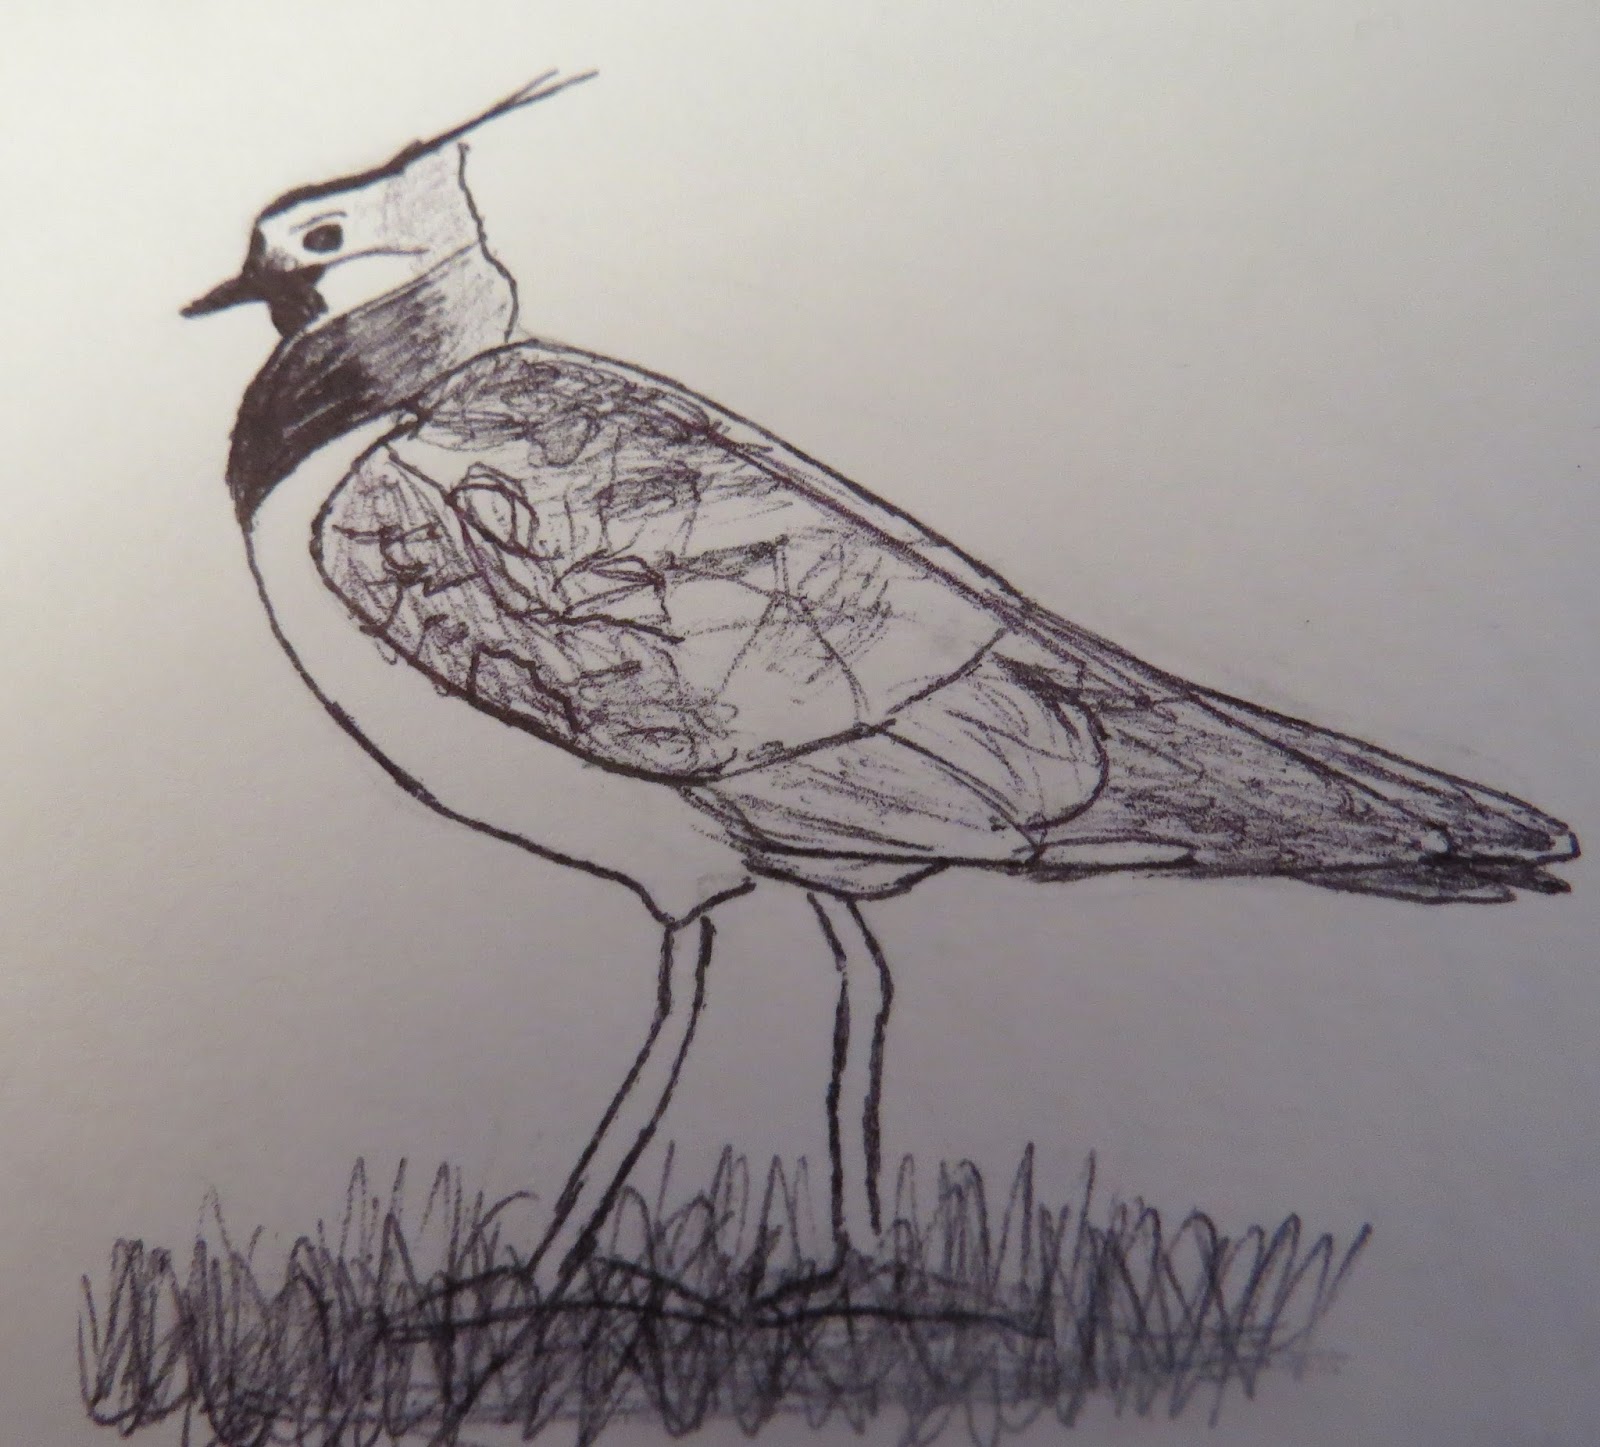
| Stage Three |
Redraw and shade in your lapwing with your pen.
 |
| Stage Four |
Now colour your lapwing in. I used green, a bit of pink and orange with red for the legs. Other plovers will lack the crest and can be speckled all over.
I hope I have helped you on your way in drawing other species of wader. But if you are stuck or want me to draw more species of waders, give me a comment below and I will gladly do another How To Draw: Waders with the species you are after. Until then, good luck with your drawings!


Excellent drawings and advice, I took up photography because I couldn't draw well, but I keep meaning to try again with pencil drawings and see what I can do (my current goal is to start next year).
ReplyDeleteAll you can do is to practise, practise and more practise. A good tip for amatures is to practise using photographs. You can also measure the width and height of your subject with either your thumb and index finger or by using a pencil.
Delete