I didn't like my hedgehog photos that I got last night, so the next best thing I can do is to draw them. I also wanted to re-live Wednesday night's badger action and I have decided that for today's How To Draw, I will show you how you can draw both these charismatic nocturnal creatures. Lets start with hedgehogs.
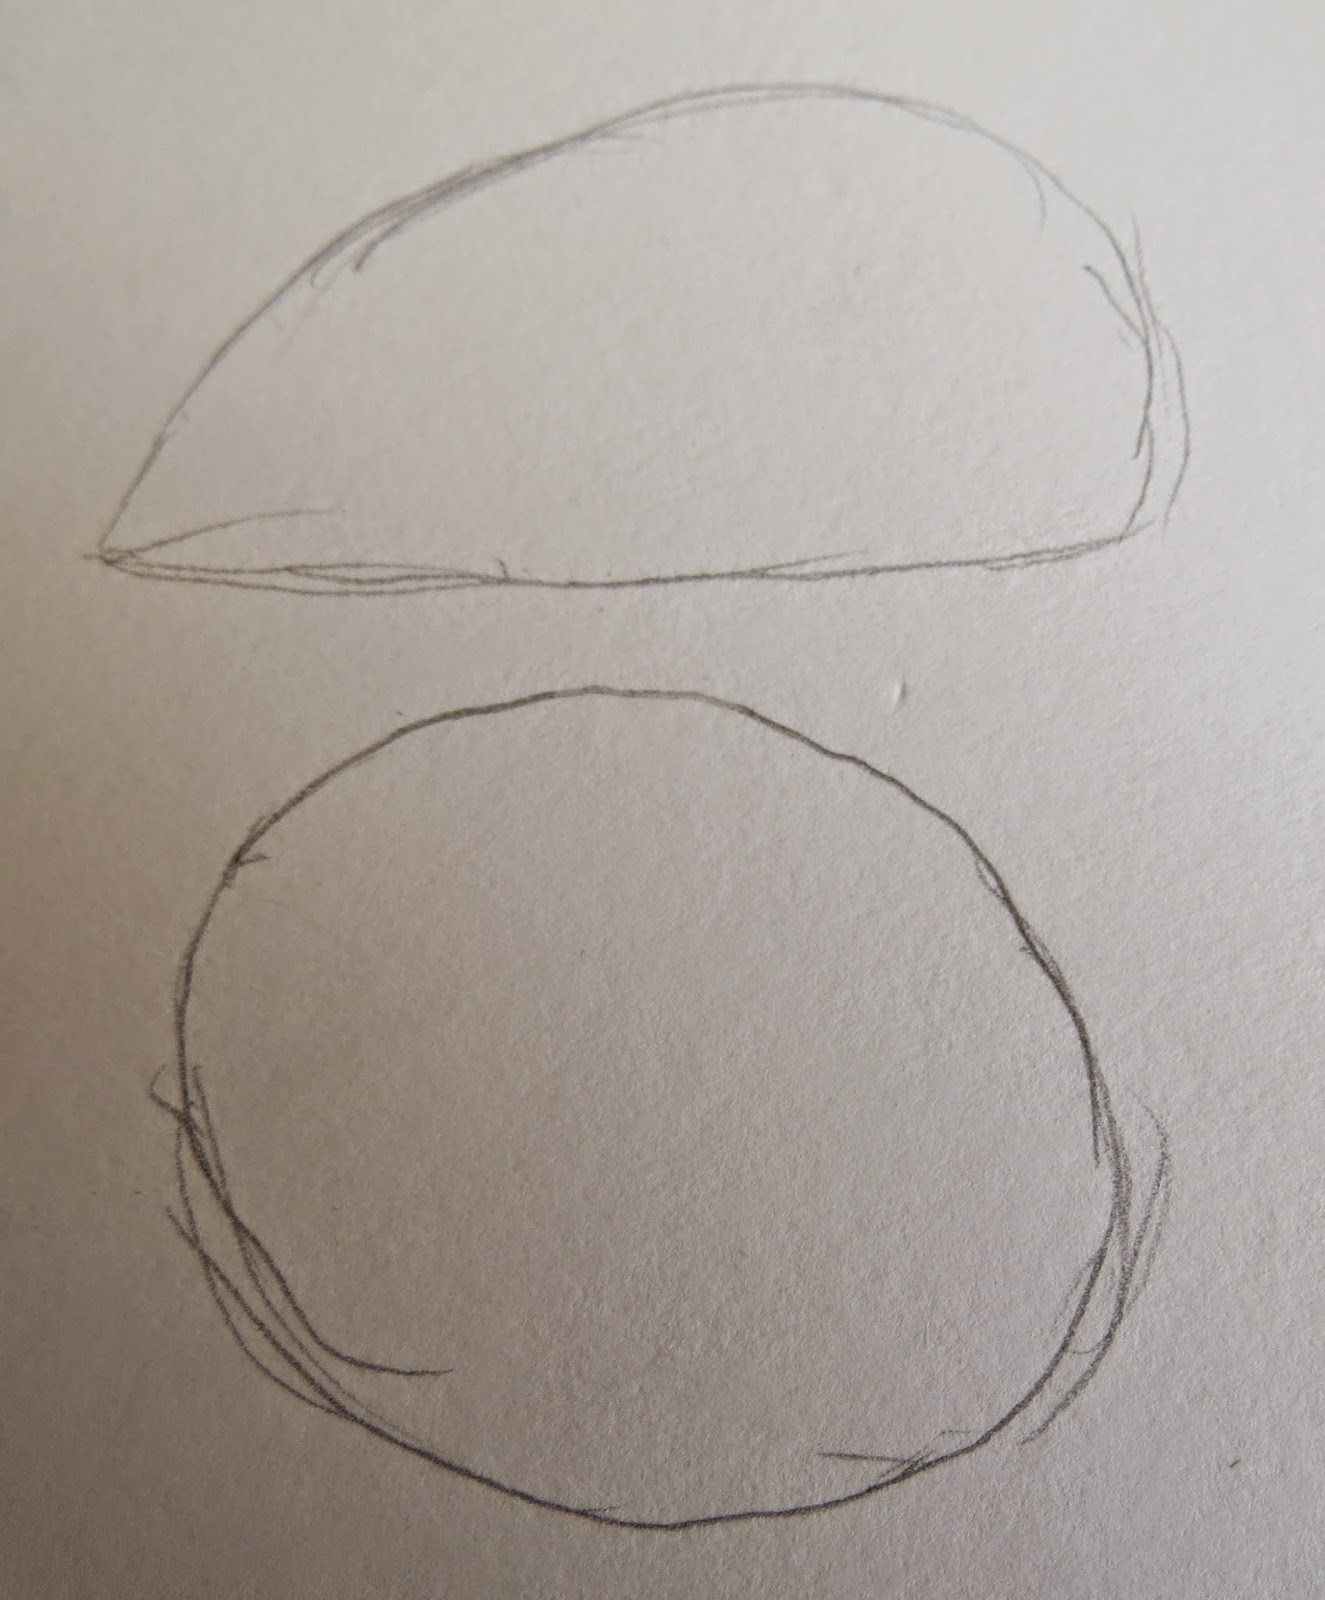 |
| Stage One |
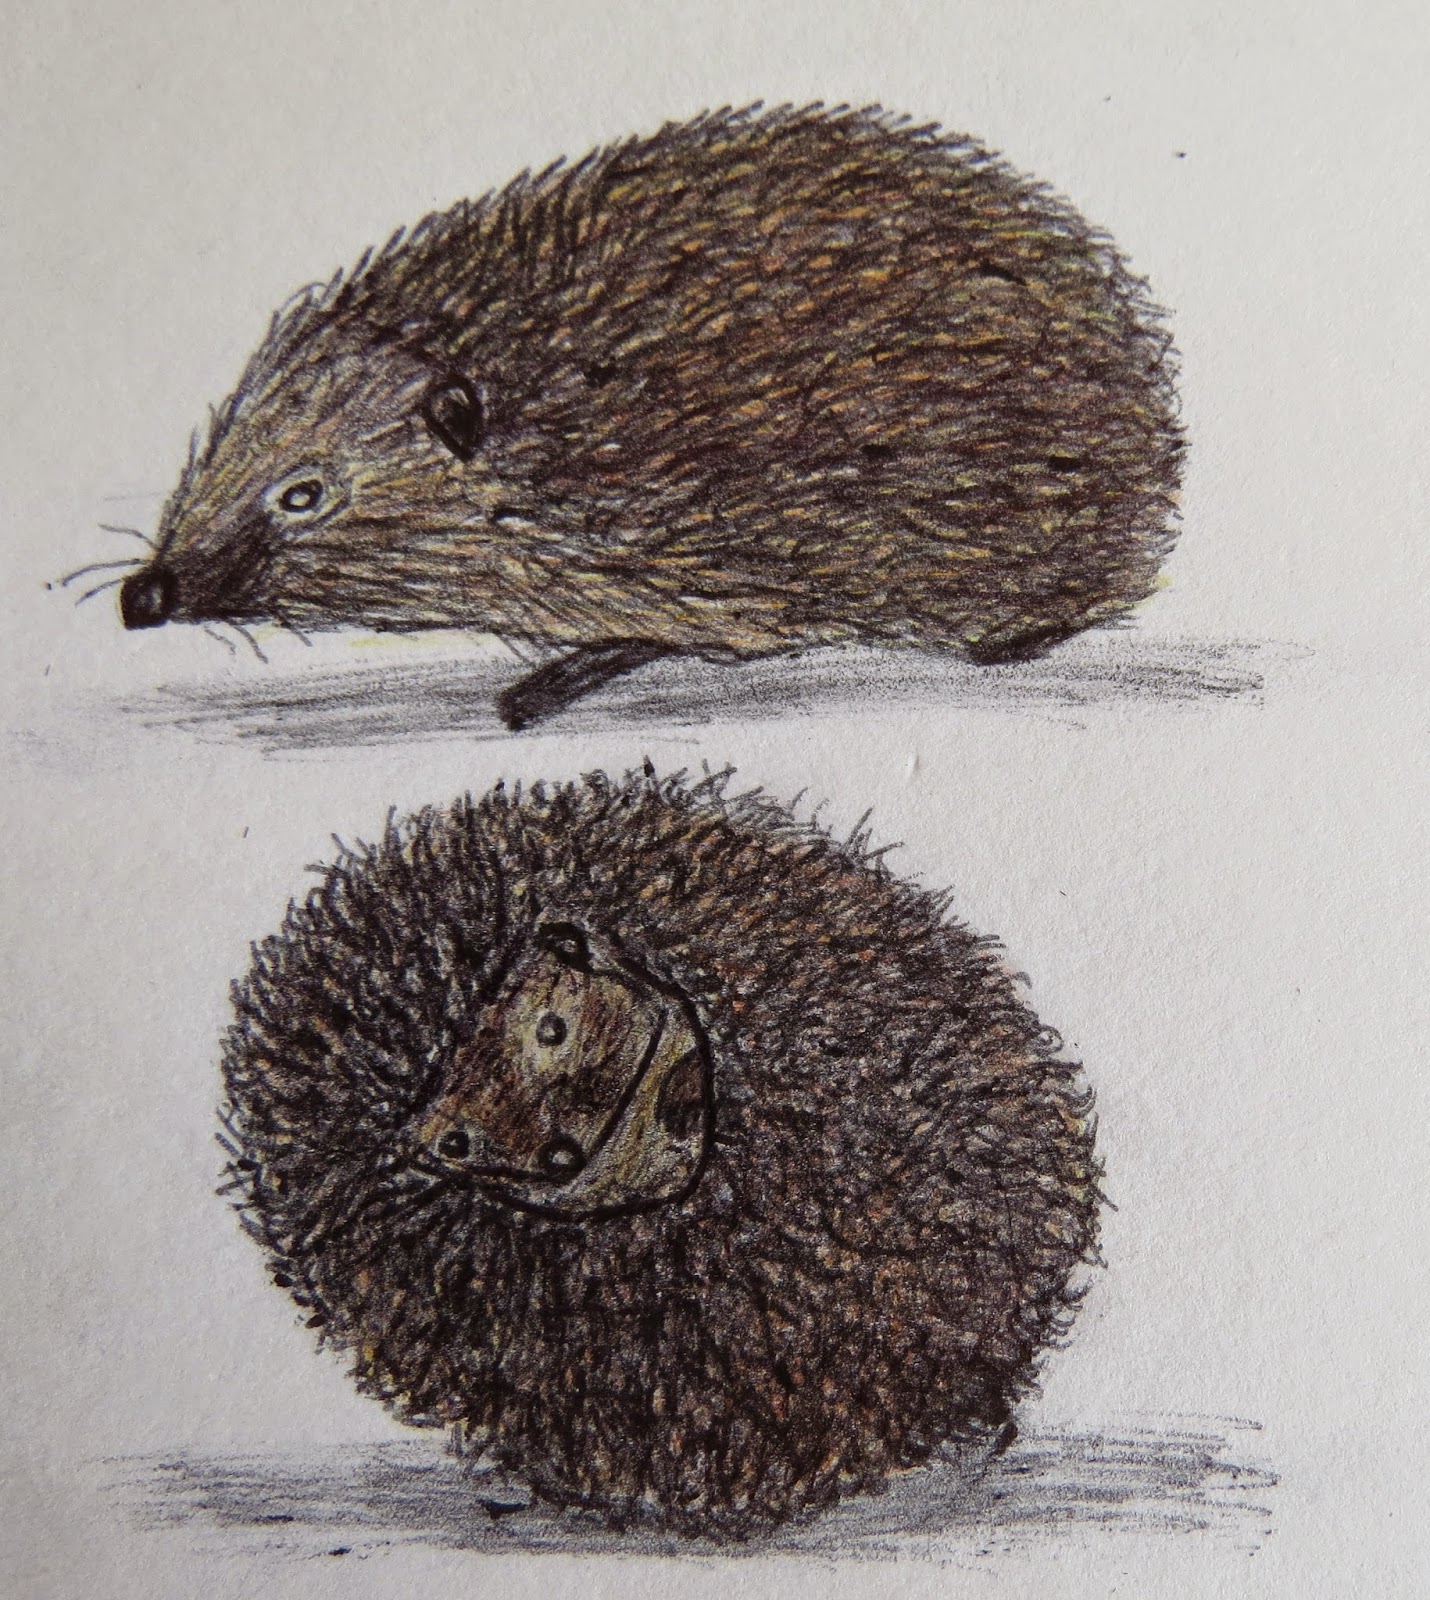
I am going to show you not one, but two hedgehogs. The one above is an average hedgehog, while below is one rolled up into a protective ball of spines. For the one above, draw a shape that is similar to an iron. For the one below, draw a large circle.
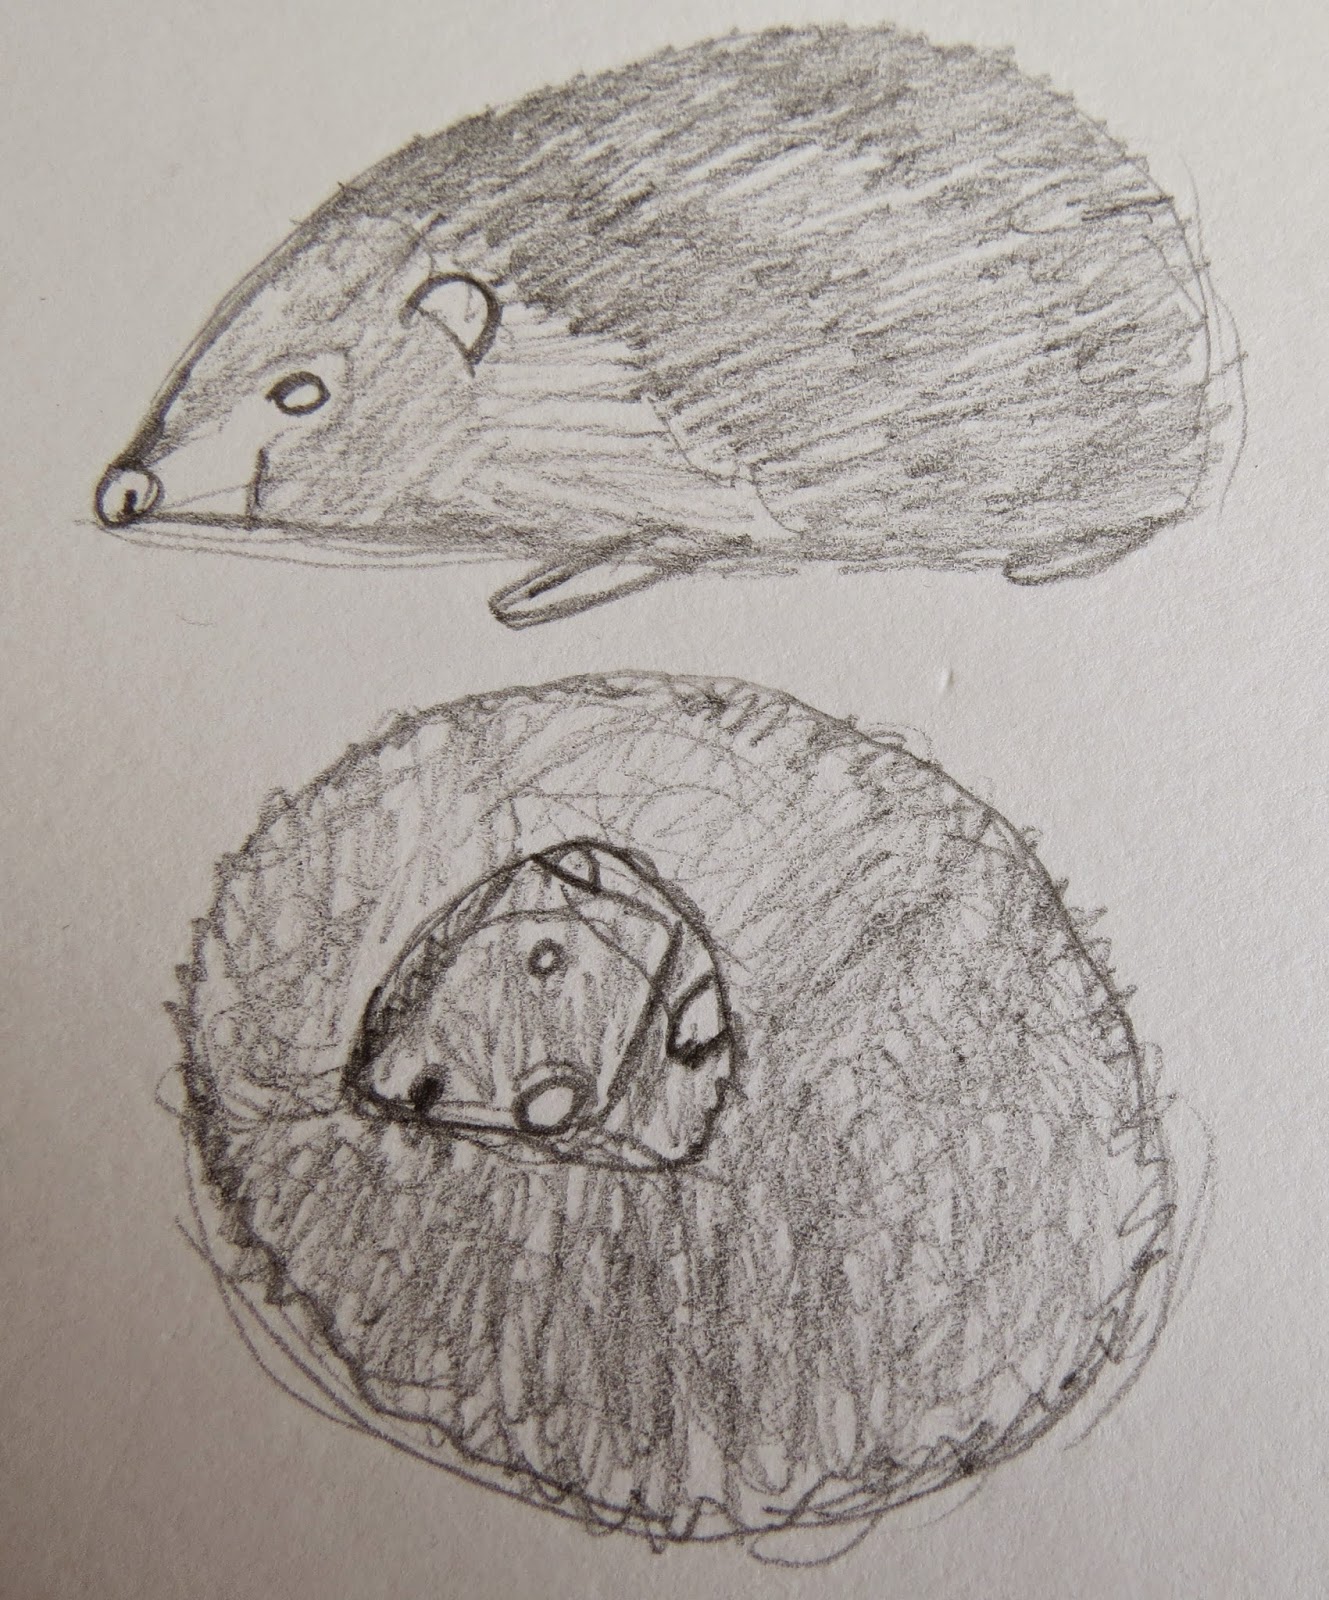 |
| Stage Two |
Focus your attention on the features before you work on the spines. Work from the nose (a simple circle) and from the top, draw a line that rounds where you want the eye to be and then draw downwards to create the snout. Draw a semi-circle for the ear and two simple leg shapes. Now draw a line from the top of it's head to the back of it's front leg to devide the soft underparts and the spines on it's back. Then scribble away to form basic spiny shapes which overlap the guidelines. With the hedgehog curled into a ball, draw a blob shape in the centre and then draw a forward facing head with it's features. Scribble outwards all the way around the head for it's spines. Scribble lightly on the head and other soft parts.
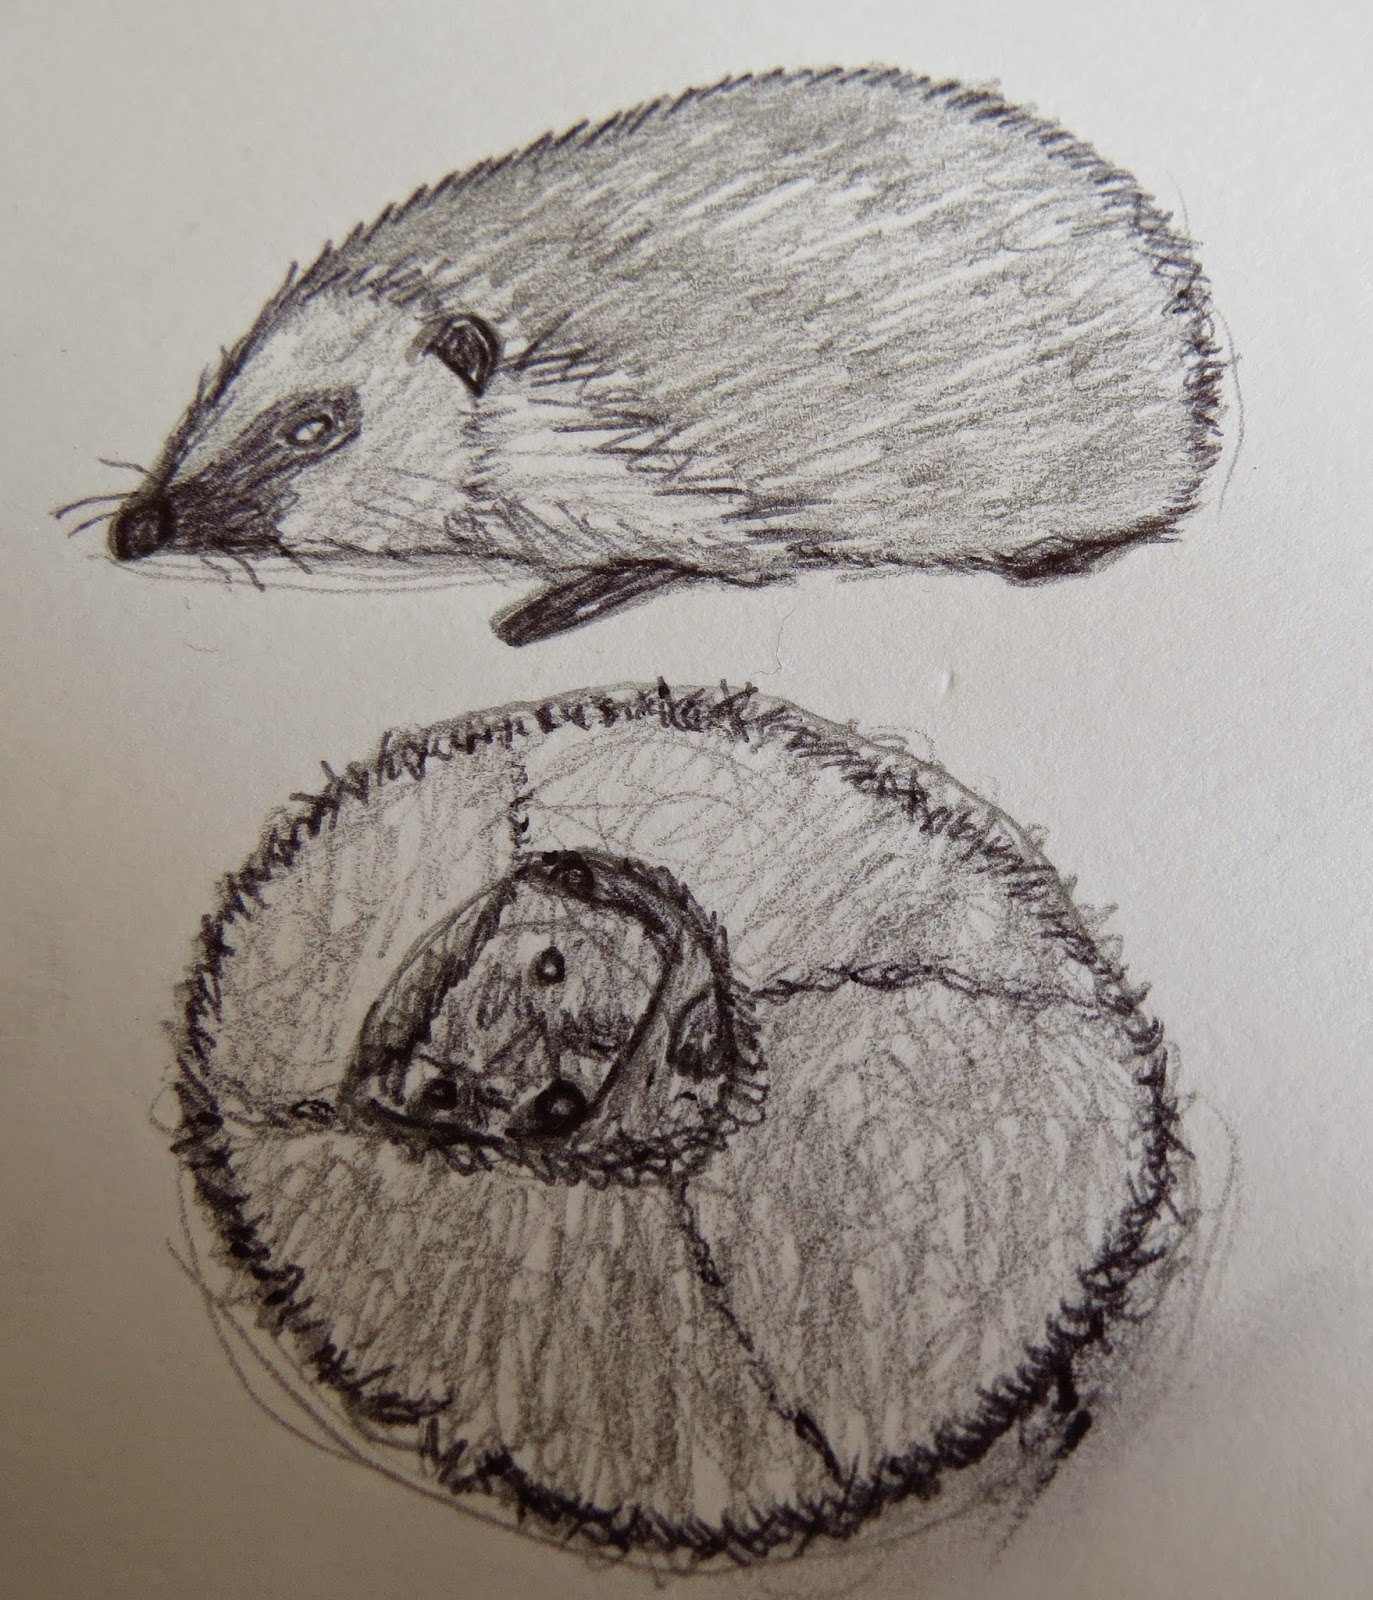 |
| Stage Three |
With a pen, draw the eyes, nose, ears, legs, whiskers and a rough outline around the soft parts. For the area covered in spines, create an outline made of small lines before working on the main bulk of spines covering it's body. To help you out with the rolled up hedgehog, devide the ball into four parts.
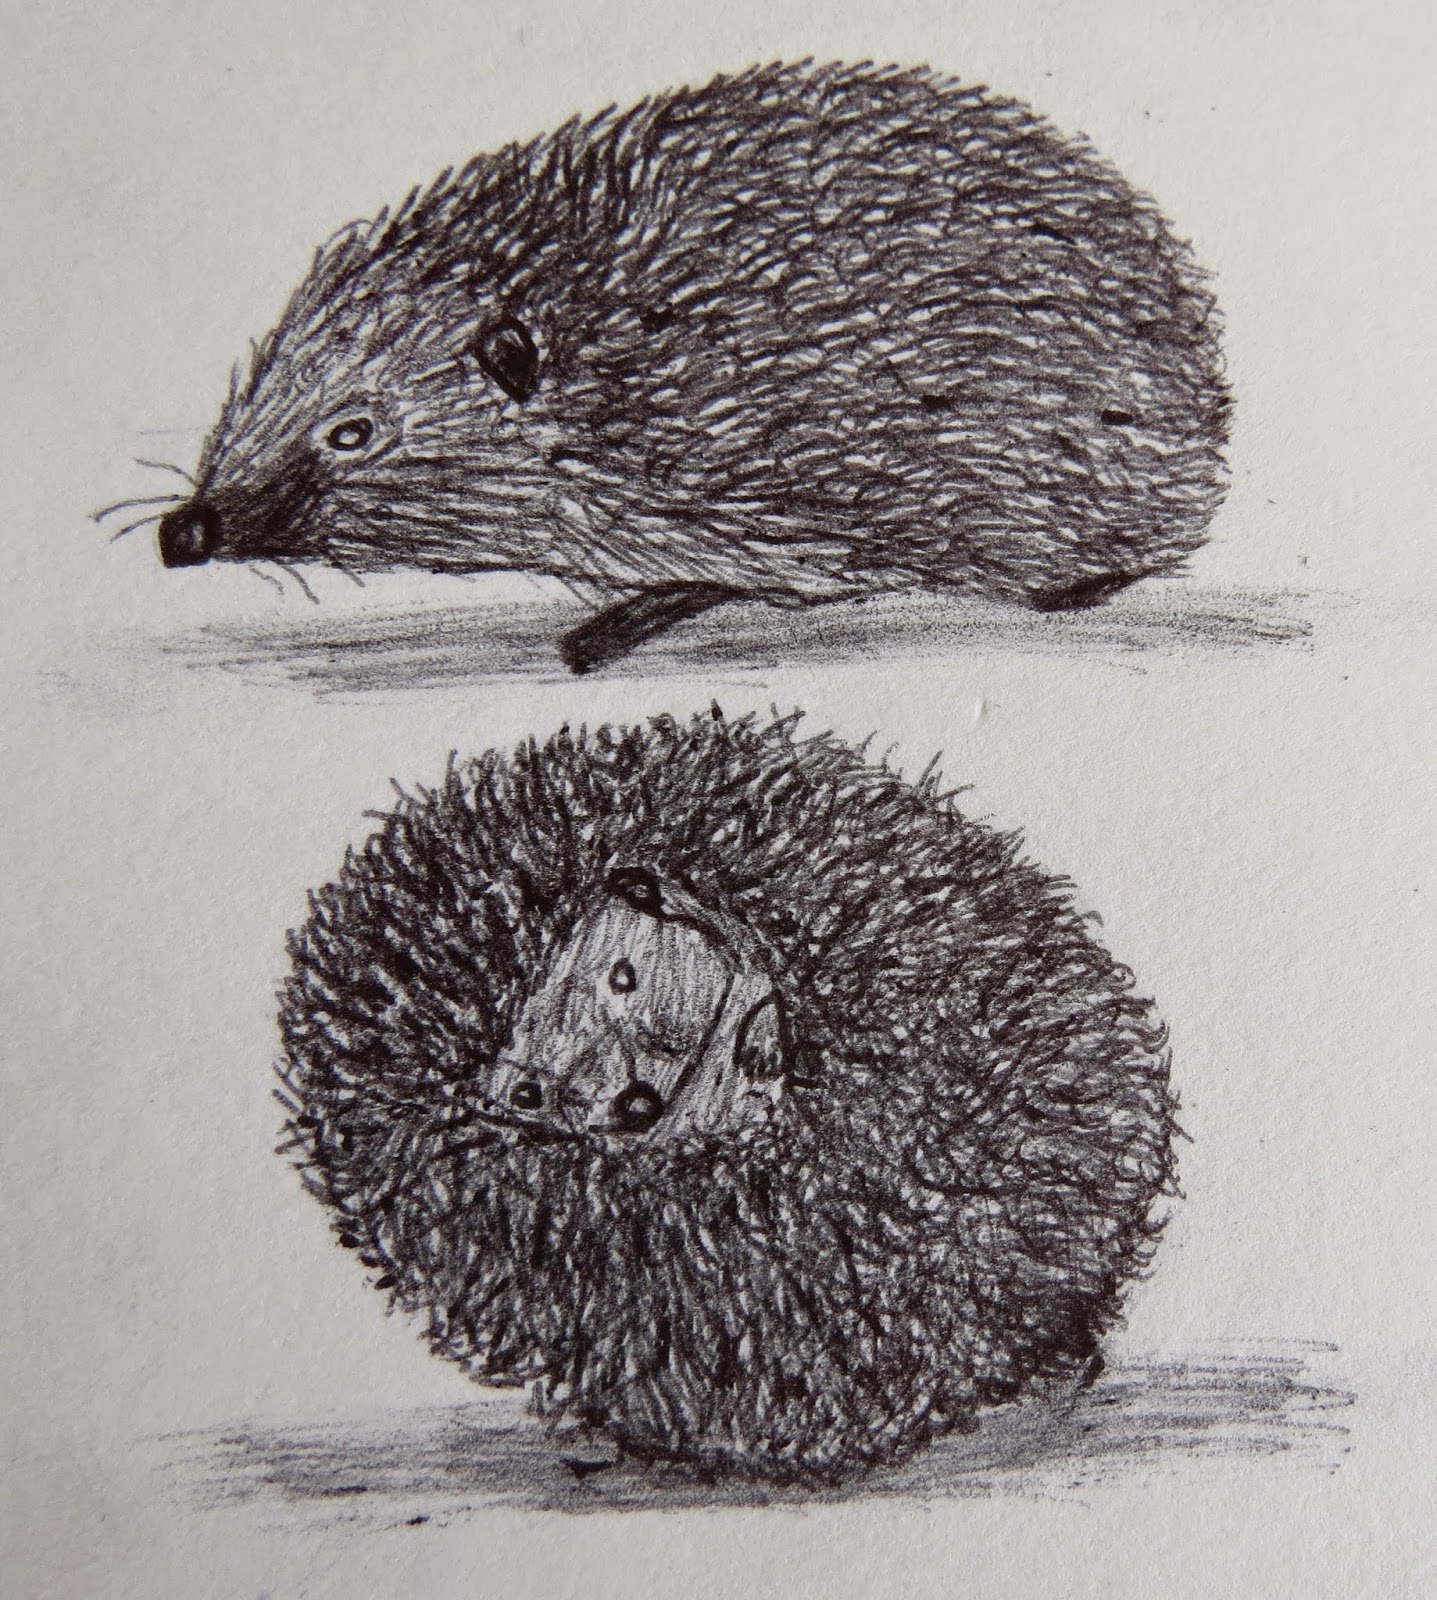 |
| Stage Four |
Once the outline is done, you can cover the hedgehogs with spines. Create small lines from it's head to it's rear. You can go as mad as you like, go nuts! Try and make the back as thick as possible, while the soft parts as light as possible. Shade in the features some more to make them stand out.
 |
| Hedgehogs |
Finally, colour them in. Start with a light layer of yellow and then brown. Dark brown for the back and light brown for the head. And then, for one last measure, go over the spines in pen. There you have it, two spiky hedgehogs.
 |
| Stage One |
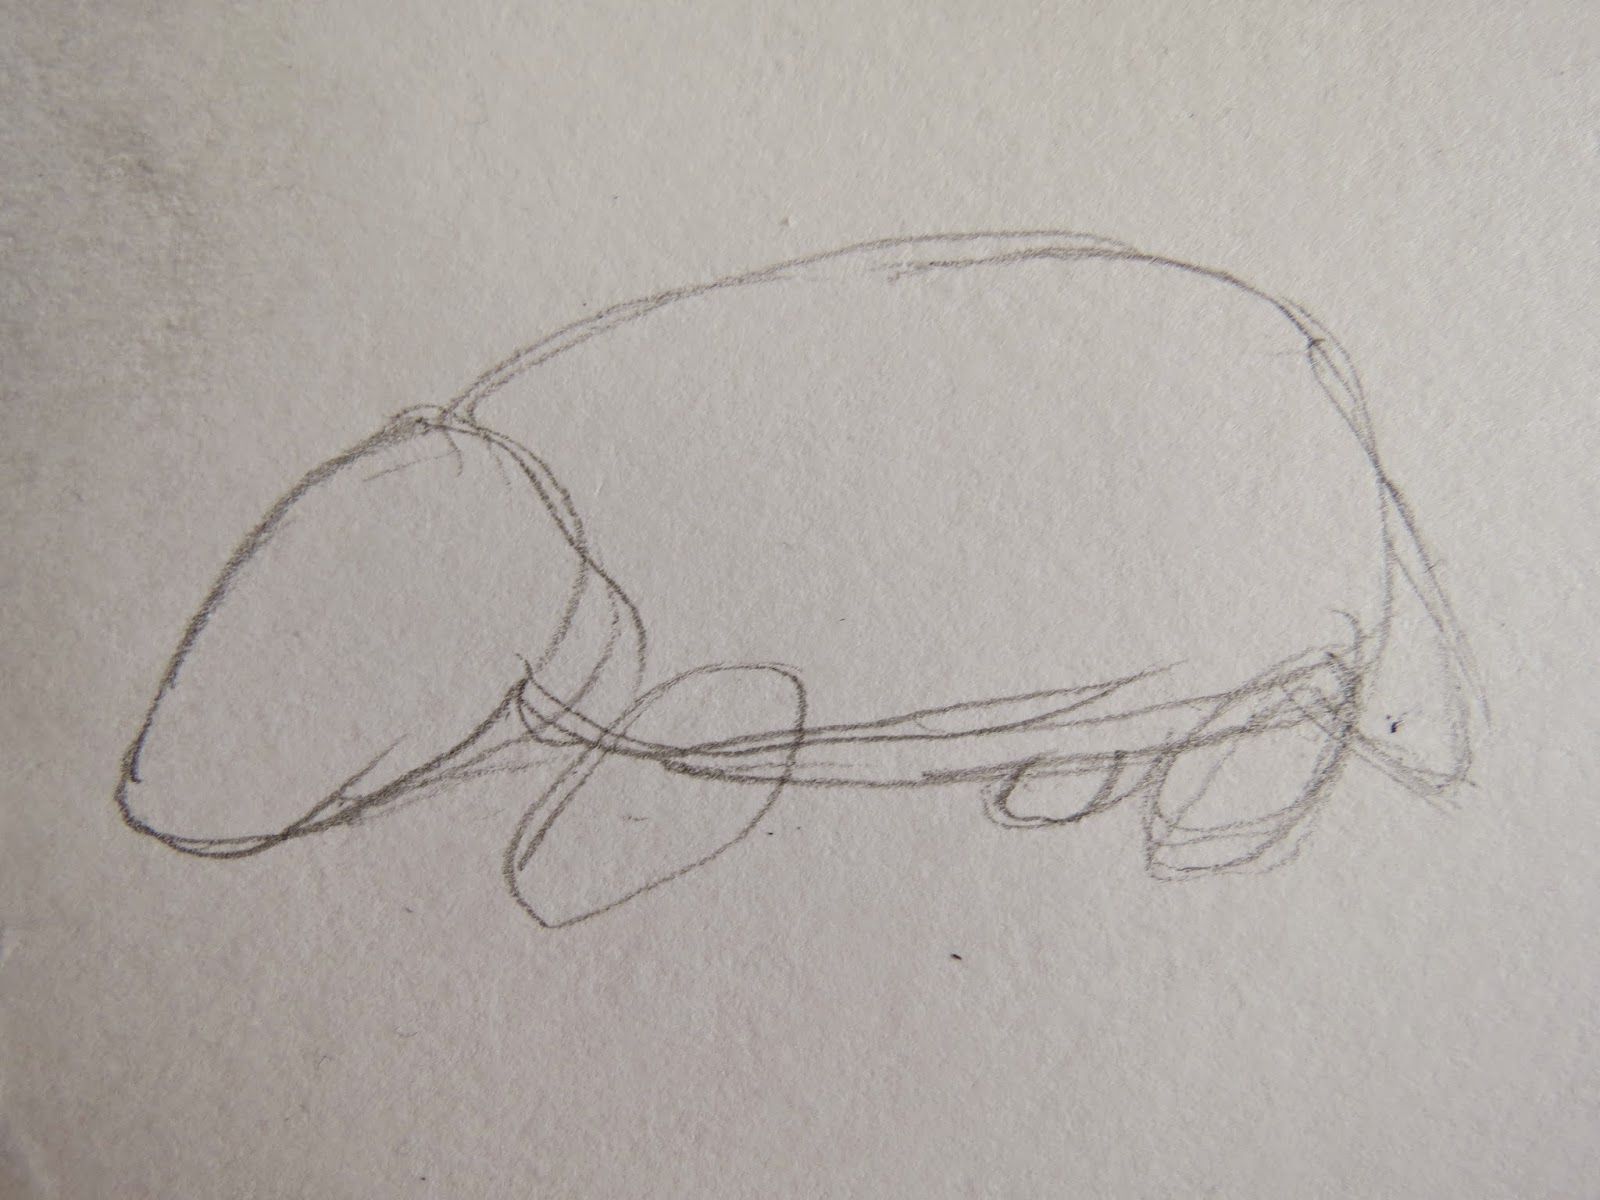
Badger time now. To draw him (or her), make a large oval for the body, an egg-shape for the head, 3-4 short legs and a tail at the rear.
 |
| Stage Two |
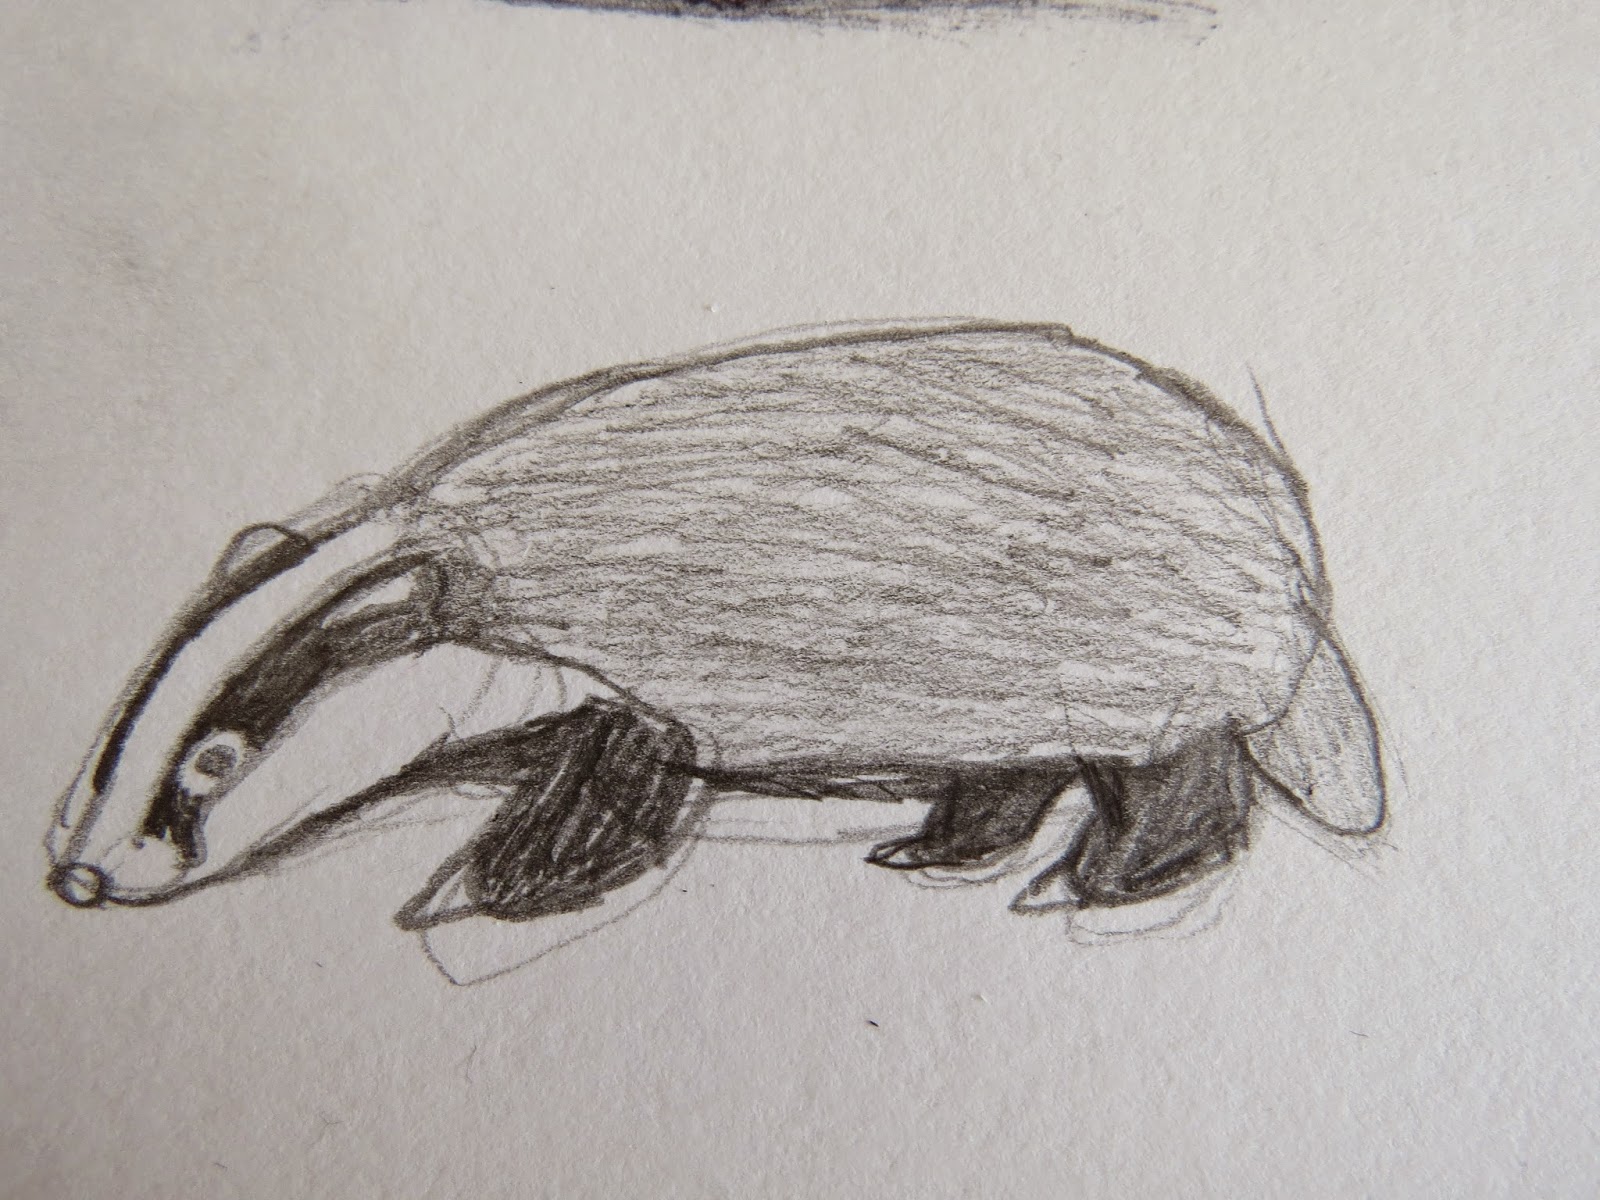
Now you have your basic badger shape, it is time to add the details. Start from the end of the badger's snout. Make a small circle for his nose. Then make a line from the bottom of his nose and go along his head. When you reached the end of his head, go a few inches down and draw back down to his nose again with a slight curve. You have formed a stripe and now you can add an eye and an ear within it. Shade in your stripe, leaving space around the eye and the ear. Shade in the second stripe at the top of his head (with a white ear on top) and the legs and under belly black. The body and tail is shaded grey. Draw in claws at the end of each foot.
 |
| Stage Three |
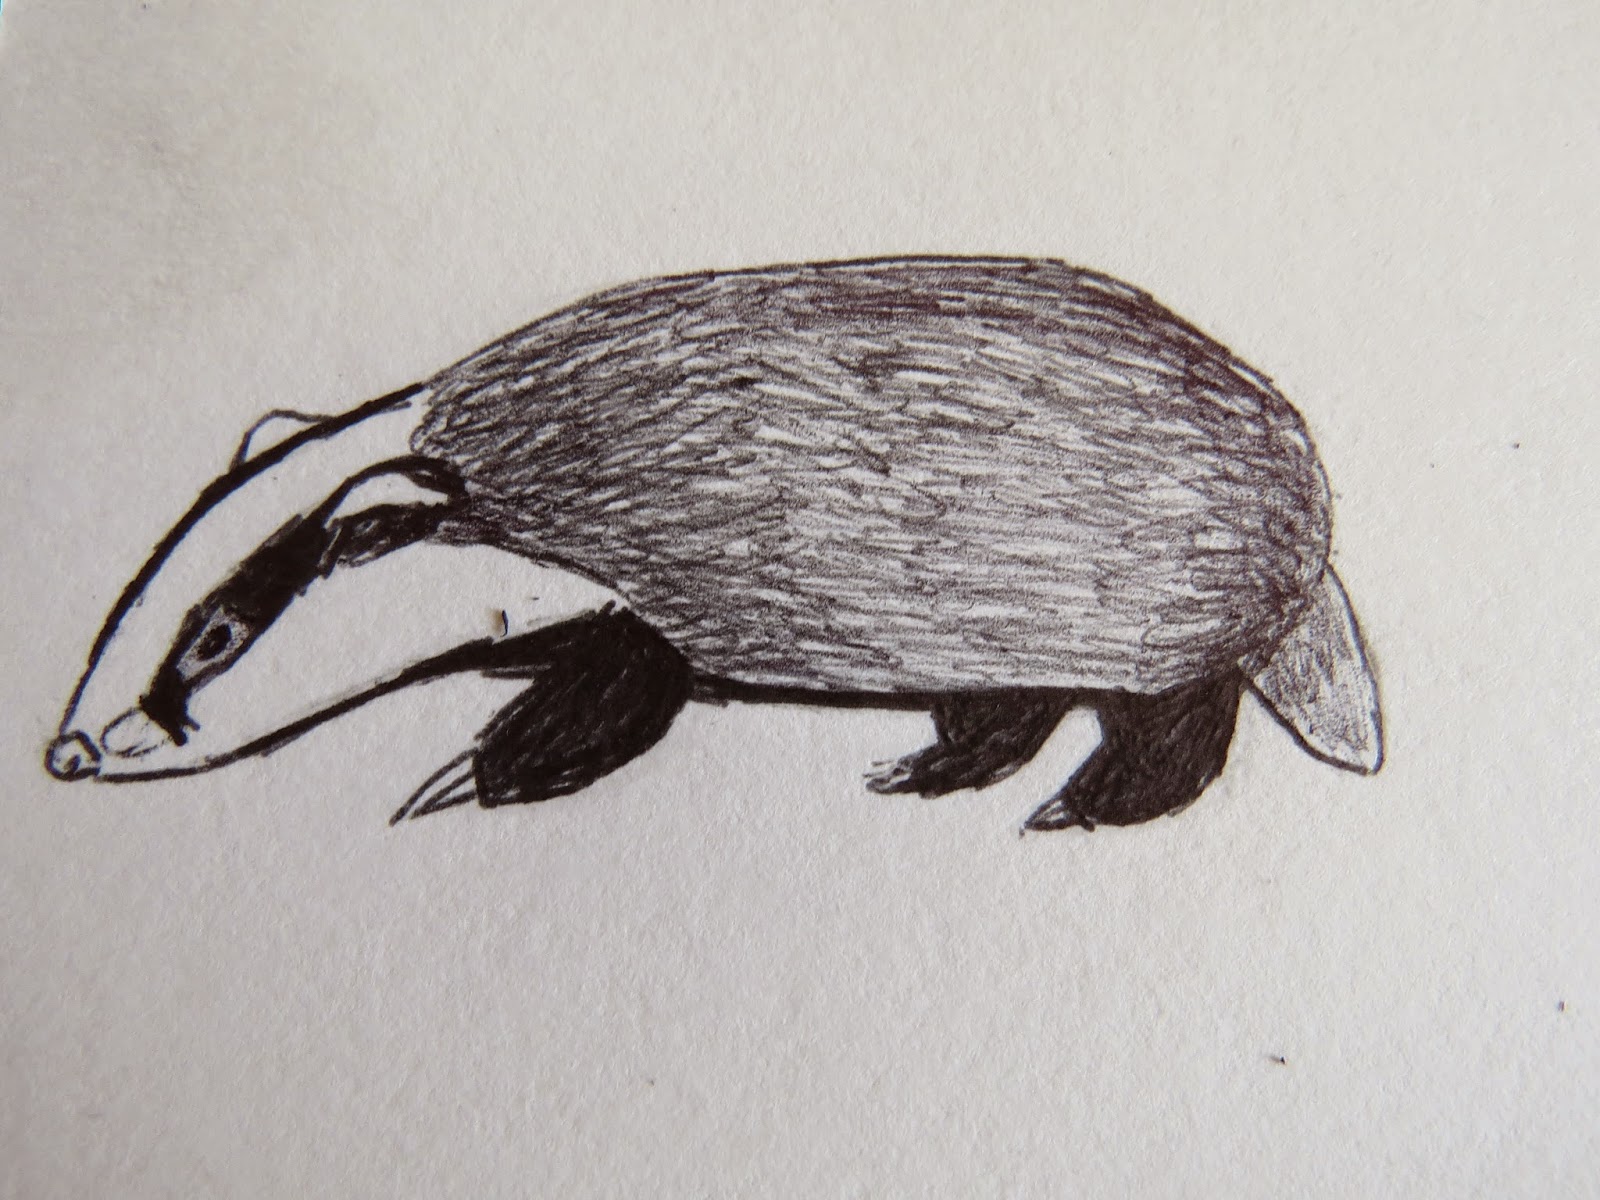
Repeat what you have done in pen. Create fur for his body by stroking the pen into short lines.
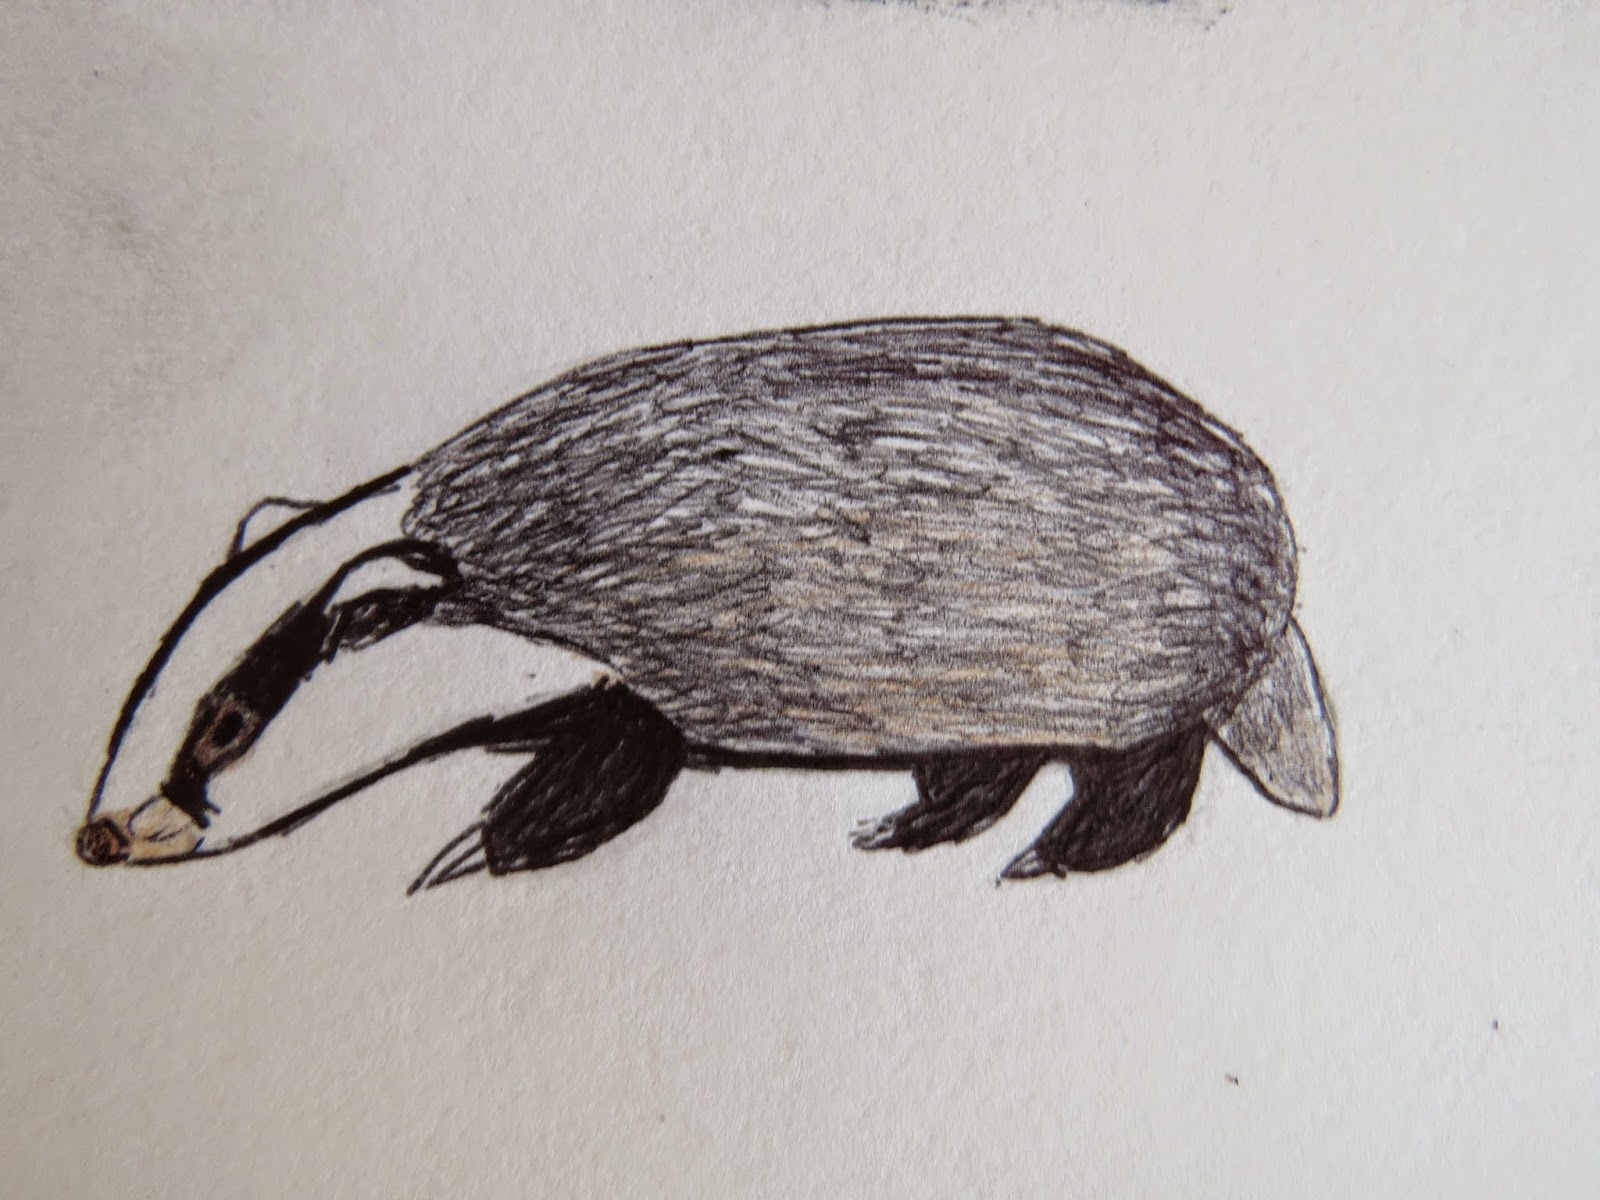 |
| Badger |
There isn't much colouring in for a badger, just a very light layer of brown on his body, snout and nose. And that is about it.
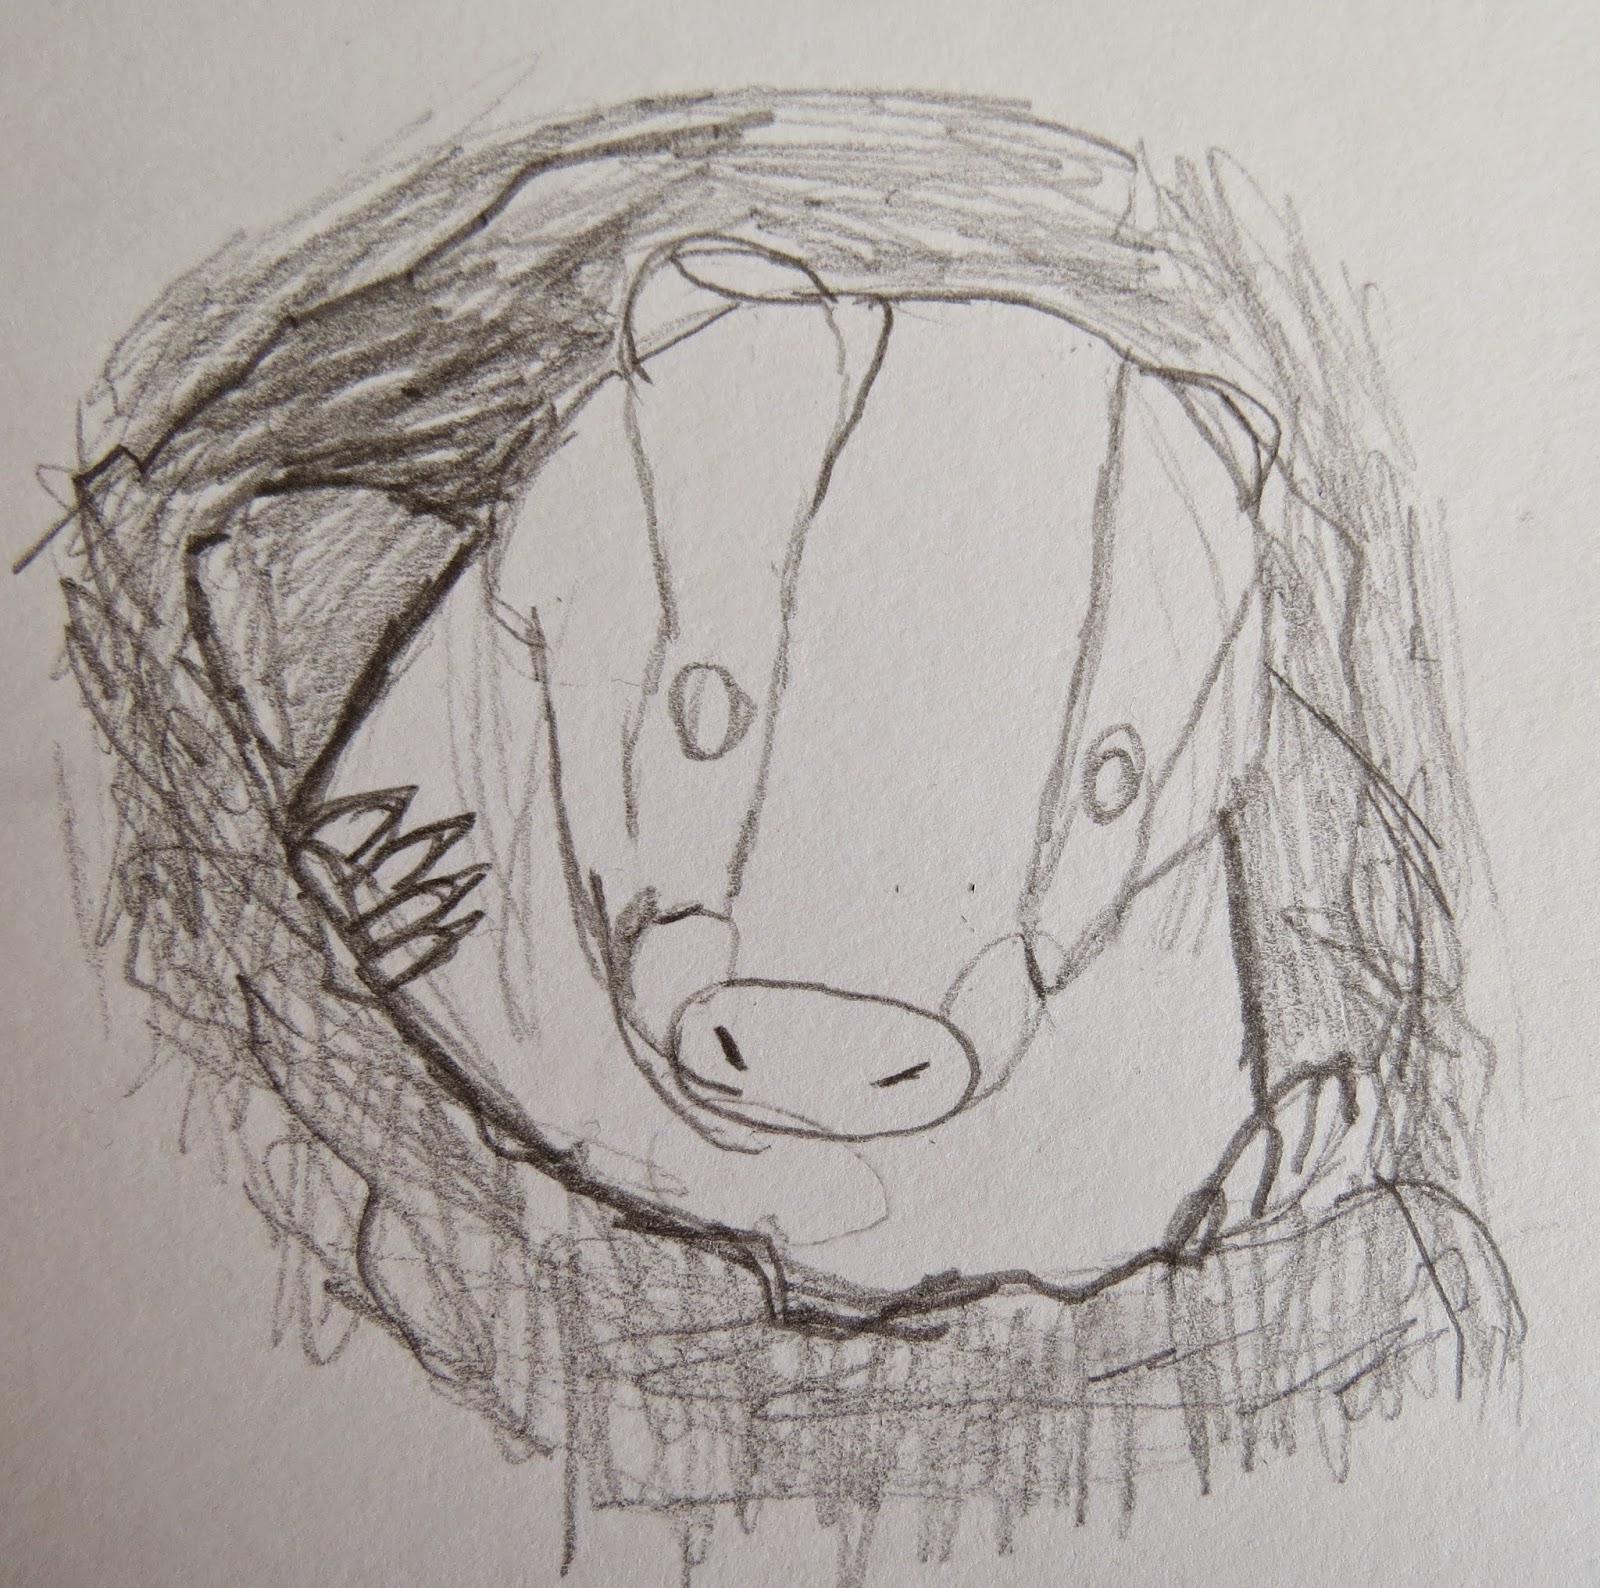 |
| Pencil Stage |
Just for fun, I thought I finish off with a close up of a badger peering out from a sett entrance hole. The head is egg-shaped again but is now facing me. The nose is an oval and you draw from both ends of it to make both of it's stripes. From the ends of both cheeks, draw a line each downwards to create the body. Then I mark out the bottom edge of the hole and scribble around it. The claws are then added.
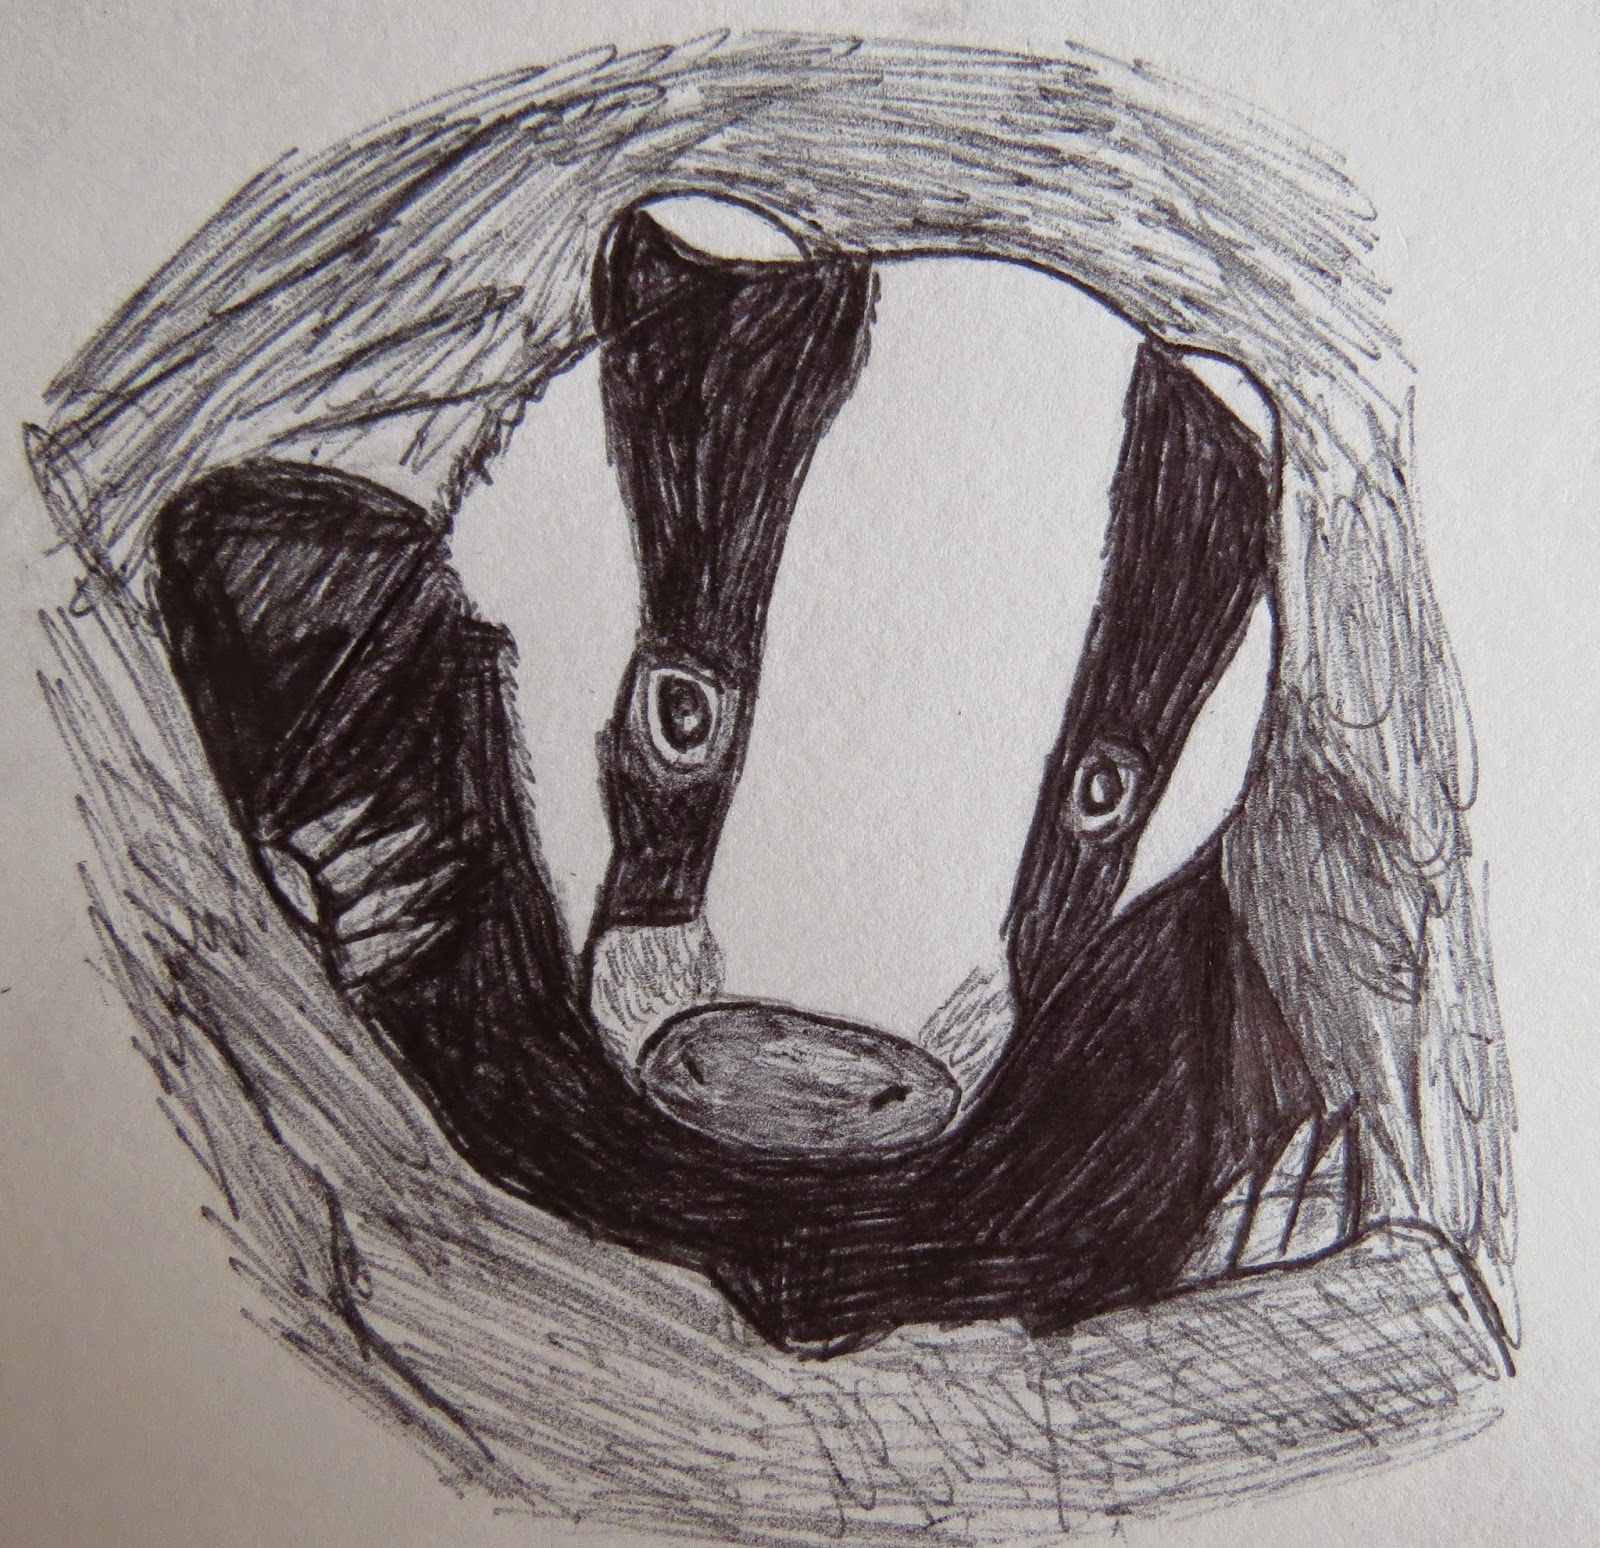 |
| Pen Stage |
I then go over in pen. I go to town with the shading, keeping a careful eye on each feature and how thick or light I apply the pen.
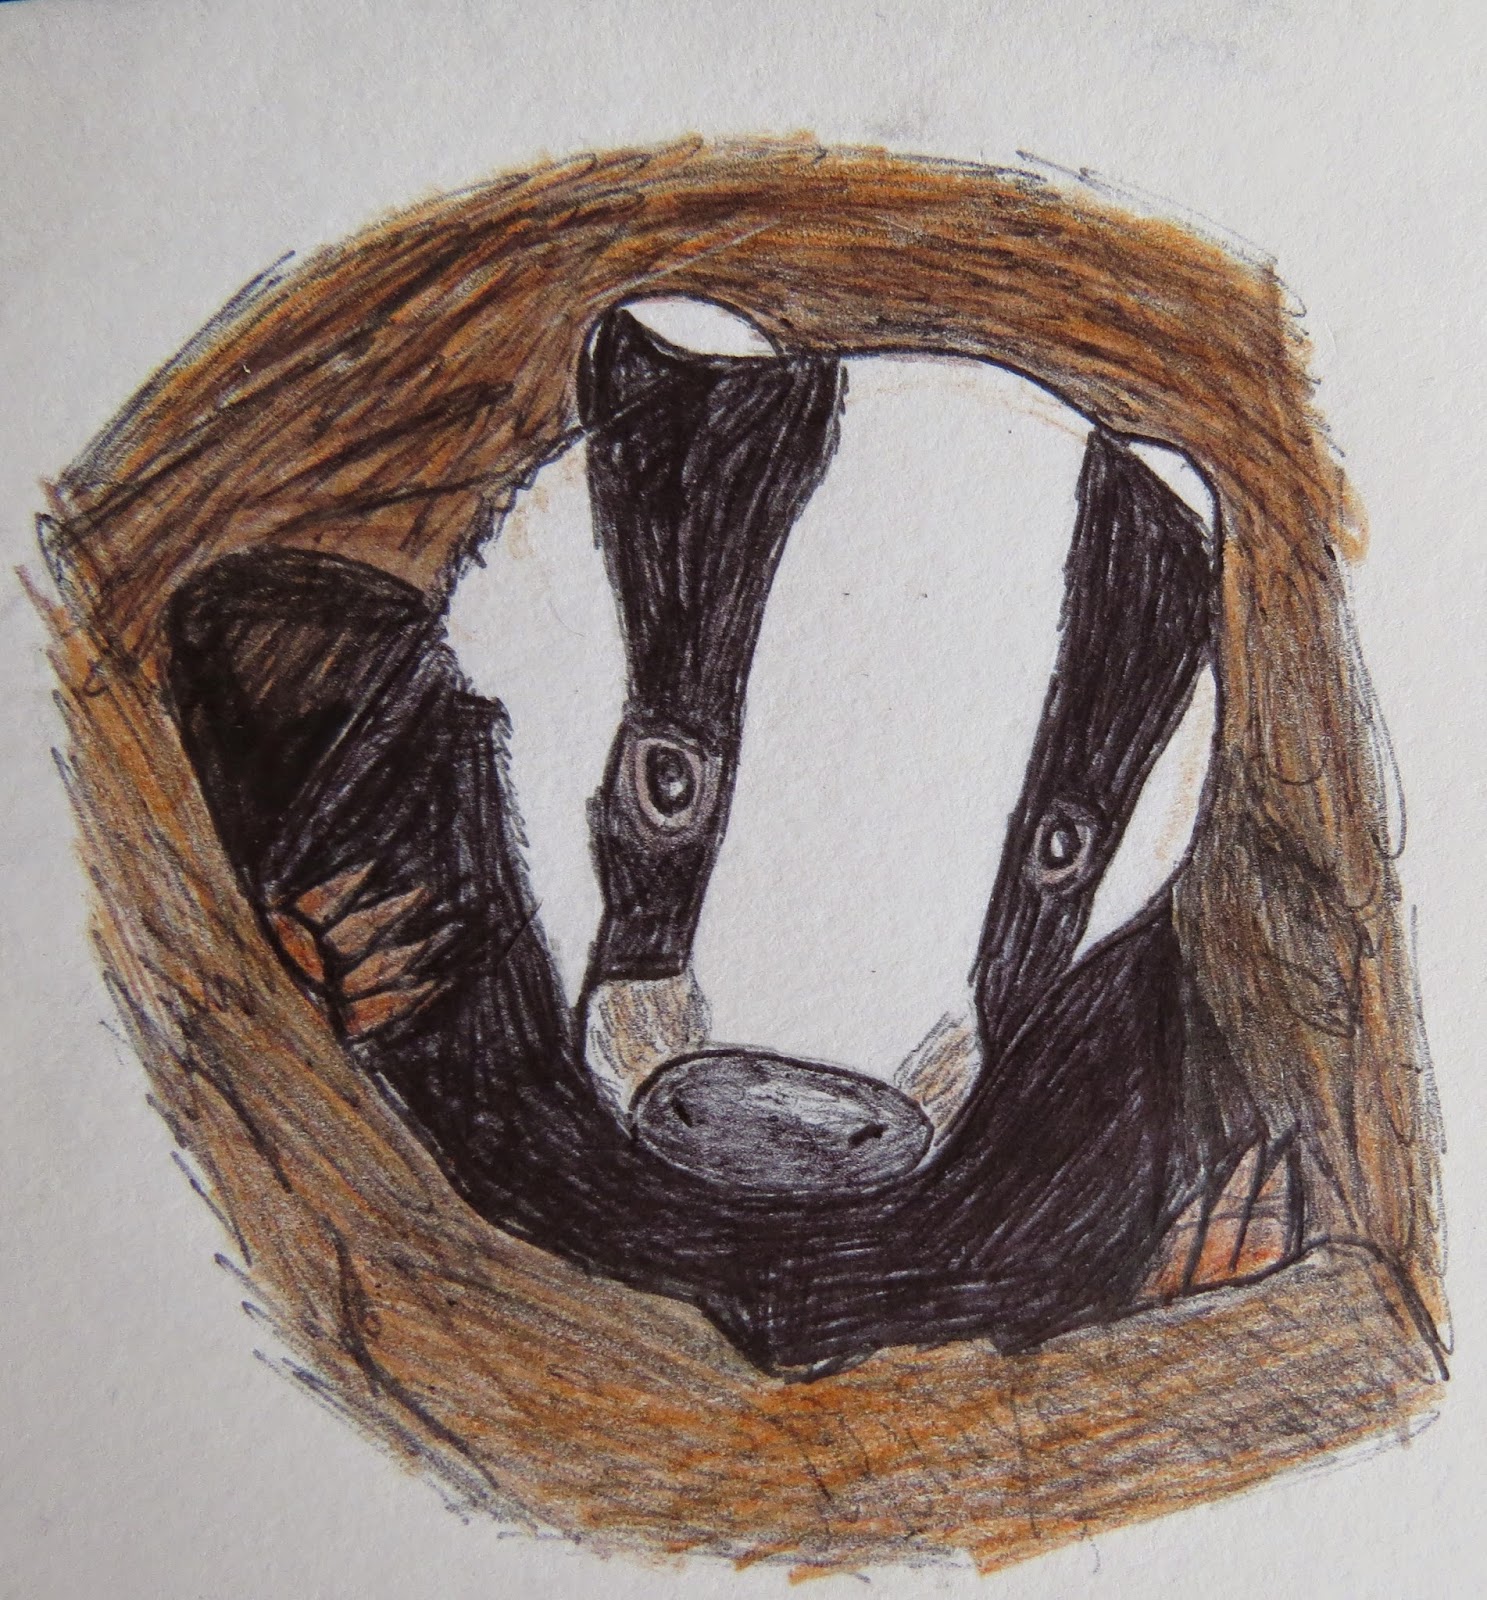 |
| Colour Stage |
Lastly, I coloured in. I worked away on the sett entrance first with a mixture of light and dark browns. Then a light layer of brown is applied to the snout and patches around the eyes. The paws are also brown but with a bit of orange on top of it.
I hope you have enjoyed this How To Draw and I wish you luck with your own drawings. Next week, I might do butterflies. If you have any suggestions for future How To Draws, comment below.
Lovely drawings again - you're very talented!
ReplyDelete